



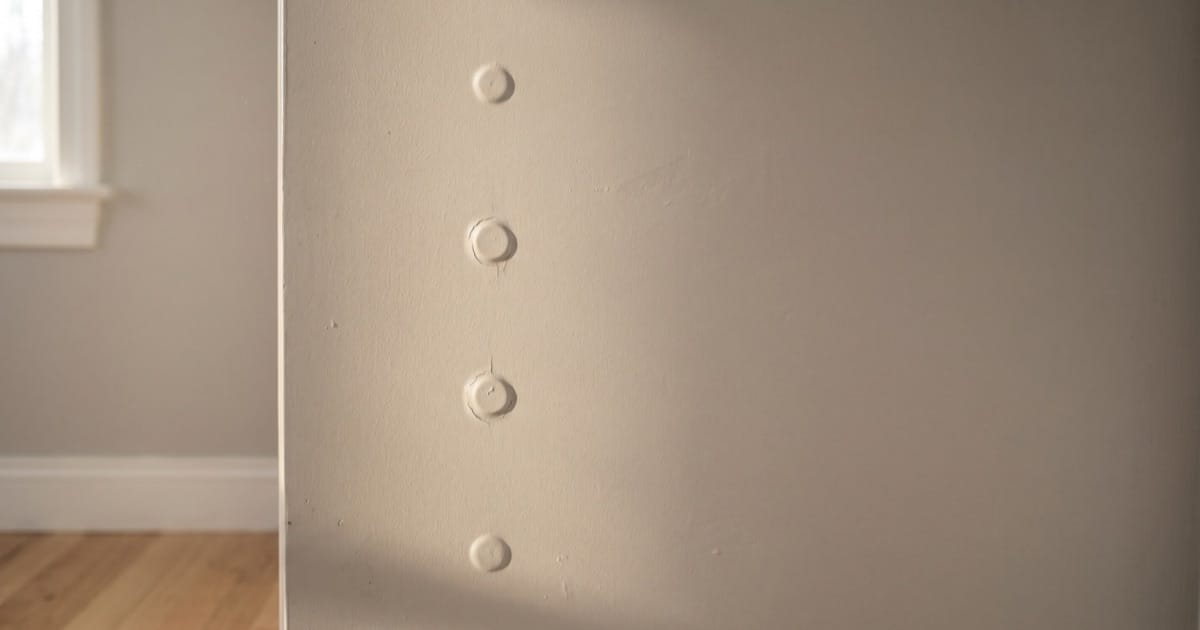
TL;DR: Nail pops in drywall show up in winter because heated air dries the wood framing, the studs shrink away from the board and the fastener heads are left standing proud. The fix before paint is to refasten the board with screws, set or pull the old nail, fill, sand, prime and repaint the whole wall.
Seeing little bumps and hairline seams this winter? Call or text Dave at (774) 217-9567. We'll look at where they are, how many there are and whether it makes sense to fix and paint now or wait until spring.
Once the heat comes on in MetroWest, the calls start: a row of small bumps down a hallway wall, a hairline crack along a ceiling seam. Most of the time the house is fine. This guide covers why nail pops in drywall happen, how the drywall standards say to fix them, and how we handle them before a room gets painted.
The short version
Nail pops in drywall are fastener heads, nails or screws, pushing up through the joint compound and paint. The main cause is lumber shrinking as it dries, and the heating season is when it dries the most. A pop isn't fixed by hammering it back. The board has to be pulled tight to the framing again with new screws, and the patch has to be primed and painted with the rest of the wall so it disappears. Here's our checklist before we paint a wall with pops or seam cracks.
- Find every pop in the room. A work light held flat to the wall shows them all.
- Look at the pattern. Scattered pops are shrinkage. A cluster plus cracks or sticking doors needs a closer look first.
- Check the timing. Pops that appear a month or more into the heating season are best repaired near its end.
- Refasten, don't just reset. Drive a new screw into the same stud about 1-1/2 inches from the popped fastener while pressing the board tight.
- Set or remove the old fastener. Its head goes just below the surface, or it comes out.
- Fill, sand and prime every patch. Unprimed compound shows through finish paint.
- Repaint corner to corner. A spot of new paint stands out more than the pop did.
- Keep the room warm. Compound and paint both need 50 °F or more while they dry.
What are nail pops in drywall?
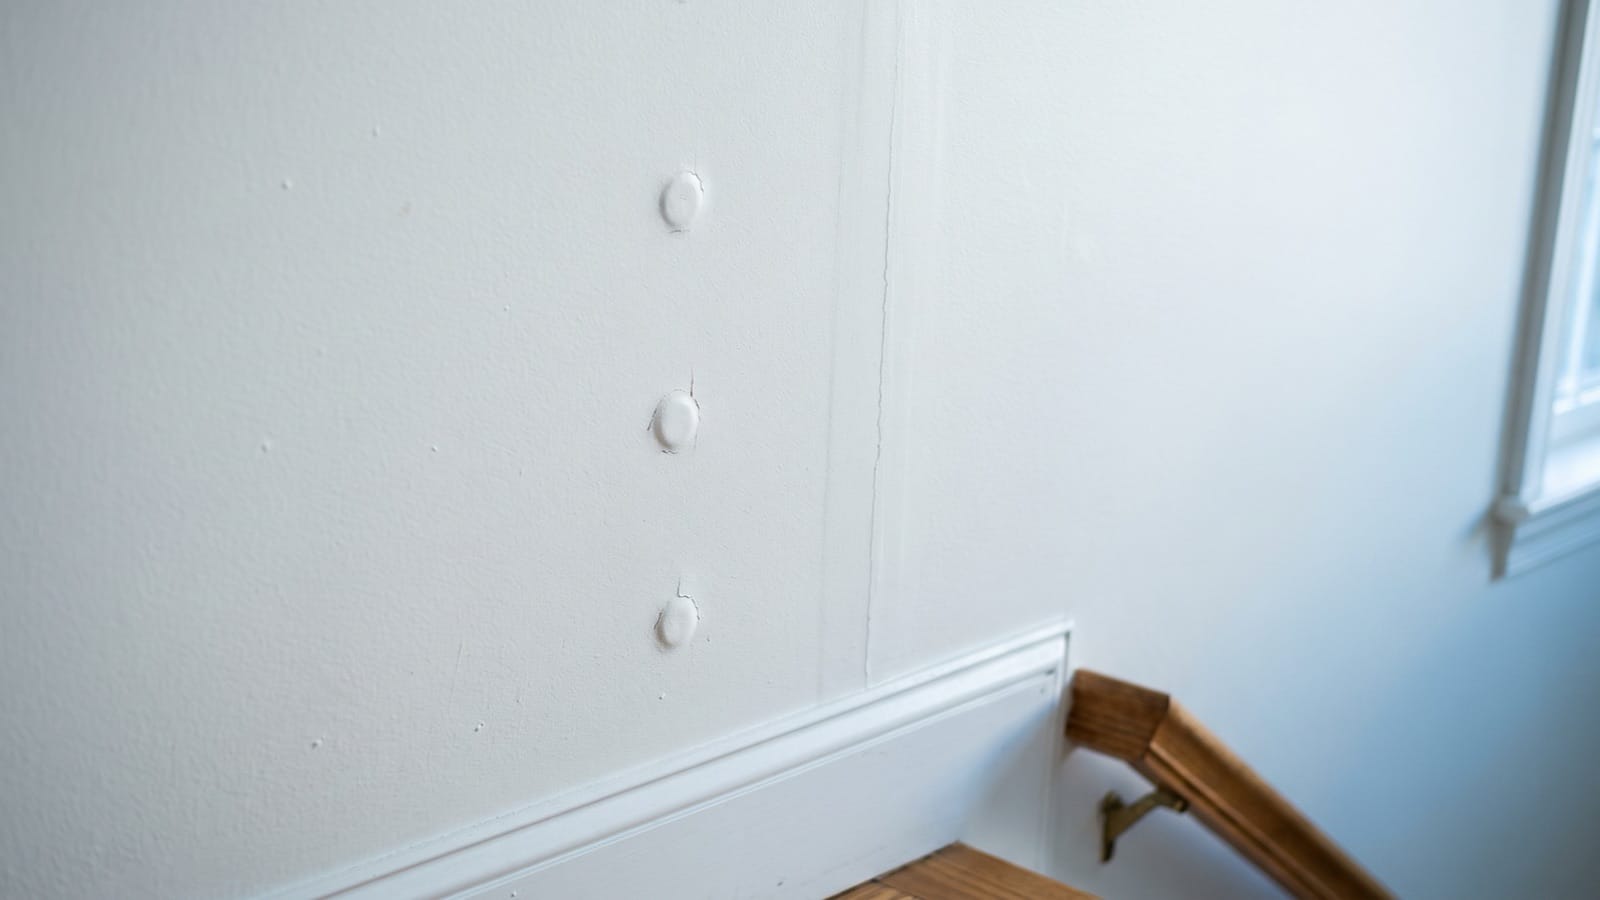
They're the heads of the fasteners that hold the drywall to the framing, showing through the finished surface. You'll see a small round bump, a crescent-shaped crack in the paint, or a dimple where the compound over the head has broken loose. They show up most on long walls, stairwells and ceilings, anywhere light rakes across the surface.
The Gypsum Association's GA-222, Repairing Screw or Nail Pops, lists the causes in one place:
- "Lumber shrinkage occurring after gypsum panel product application."
- "Loose attachment of the gypsum panel product to the framing."
- "Improperly aligned, twisted, bent, warped, or bowed framing."
- "Incorrect fastener length."
- "Improper fastening."
- "Drywall construction adhesive shrinkage."
Then it names the big one: "Fastener pops are largely caused by lumber shrinkage due to initial high moisture content in the lumber." It also says "Overly long fastener length contributes to the problem," which surprises most people. A longer nail reaches deeper into wood that's still drying, so it has more shrinkage to ride on.
Screw pops happen too, less often, which is why every repair below uses screws.
Why do nail pops in drywall show up in winter?
Because winter is when the framing dries and shrinks the most. Heated January air holds much less moisture than the same house in August, and the wood in the walls slowly comes into balance with it.
The USDA Forest Products Laboratory's Wood Handbook, Chapter 4 explains the mechanism: below a point called fiber saturation, wood "changes dimension as it gains moisture (swells) or loses moisture (shrinks)." Its Table 4-2 shows how much the air sets the wood's moisture. At 70 °F, wood settles at 9.2% moisture content in 50% relative humidity and 5.4% in 25% relative humidity. A hygrometer will tell you which of those your house is closer to on a cold January day.
The direction of the shrink matters too. The handbook says wood "shrinks (swells) most in the direction of the annual growth rings (tangentially), about half as much across the rings (radially), and only slightly along the grain (longitudinally)." Average shrinkage along the grain from green to ovendry is "between 0.1% and 0.2% for most species." In a stud, the length barely changes. The width and depth, the faces the drywall is fastened to, are what pull back.
The first winter in a new house or addition
New framing has the most drying left to do. The Gypsum Construction Handbook, Chapter 11 (the edition from CGC, USG's Canadian affiliate) puts numbers on it: "Framing lumber, as commonly used, has a moisture content of 15% to 19%. After installation, the lumber develops about a 10% moisture content and consequently shrinks, particularly during the first heating season." The same chapter calls fastener pops "one of the most expensive problems encountered" in wood-frame construction and adds: "Even kiln-dried lumber can shrink, warp, bow and twist, causing board to loosen and fasteners to fail."
That's why a new house, addition or finished basement so often gets a rash of nail pops in drywall the first winter and far fewer after.
Why nail pops in drywall return in older houses
Older framing still swells a little each humid summer and shrinks a little each dry winter, and each cycle can work a loose nail out a hair further.
Why do drywall seams crack in winter too?
The same seasonal movement behind nail pops in drywall also stresses the taped joints. The Gypsum Construction Handbook, Chapter 12 describes joint cracking as appearing "directly over the long edge or butt ends of boards," and says it's "Often caused by structural movement and/or hygrometric and thermal expansion and contraction, or by excessively fast drying of joint compounds."
A second winter seam problem is ridging, a raised line along a joint. Once the panel bends at the joint, the handbook says, "the system takes a set and never returns to normal." Its timing advice: "Let ridge develop fully before undertaking repairs; usually six months is sufficient."
Cracks where the ceiling meets the wall
A crack right in the corner between a ceiling and an interior wall, opening in winter and closing by summer, is often truss uplift. The roof trusses arch up as their chords dry by different amounts and lift the ceiling off the wall. The Gypsum Association's GA-216, Application and Finishing of Gypsum Panel Products, describes a "floating angle method" for new work that is meant "to minimize the effects of truss uplift and the possibility of fastener popping in areas adjacent to wall and ceiling intersections." A painter can't stop truss uplift. We cover what can be done about the corner in why ceiling cracks show up every winter.
Are nail pops a sign of foundation or structural problems?
Usually not. Scattered pops over studs and a few seam cracks are the normal signs of wood drying. The USG handbook says that with panels held tight and the right nails, "only severe shrinkage of the lumber normally will cause nail pops."
Some patterns deserve a closer look before anyone patches and paints:
- Many pops appearing at once in one area, or a pop that keeps coming back after a proper screw repair.
- Diagonal cracks running from the corners of doors and windows, especially ones that widen.
- Doors that suddenly stick or won't latch, or floors that have started to slope.
- Pops or cracks with water stains or soft drywall.
When nail pops in drywall come with signs like these, we'll tell you it's a question for a builder or structural engineer. A painter can't fix framing or a foundation, and patching over it would only hide the evidence.
How do you fix nail pops in drywall before painting?
You reattach the board, deal with the old fastener, then finish and paint. GA-222 lays out the repair: "Fastener pops are repaired by reattaching the gypsum panel product to the framing by driving a new screw or nail of the proper length into the same framing member about 1-1/2 in. (40 mm) from the protruding fastener." Here's how we do it on a wall we're about to paint.
- Mark every pop. We light the wall and ceiling from the side and mark each one in pencil, so the room gets fixed in one round.
- Press the board tight. GA-222 says to "Apply sufficient pressure to the gypsum panel to bring the back surface into firm contact with the framing member." If the board isn't pulled tight, the new screw just holds it where it's loose.
- Drive a new screw. One drywall screw into the same stud about 1-1/2 inches away, usually one above and one below on a wall. GA-216 says screws are driven so the heads sit "slightly below the gypsum panel product surface without breaking the facer, fracturing the core, or stripping the framing member around the screw shank."
- Use the right length. GA-216's Table 4 lists a minimum screw length of 1-1/8 inches for 1/2-inch board and 1-1/4 inches for 5/8-inch board on wood framing. Longer isn't better, for the reason GA-222 gives above.
- Set or pull the old fastener. GA-222 says to "Remove the fastener or reseat the protruding fastener so that it is just below the face of the gypsum panel." A nail that keeps working loose comes out.
- Scrape the loose material. GA-222: "Remove any loose material before treating with joint compound and redecorating." Loose compound and lifted paint go, or the patch will crack around them.
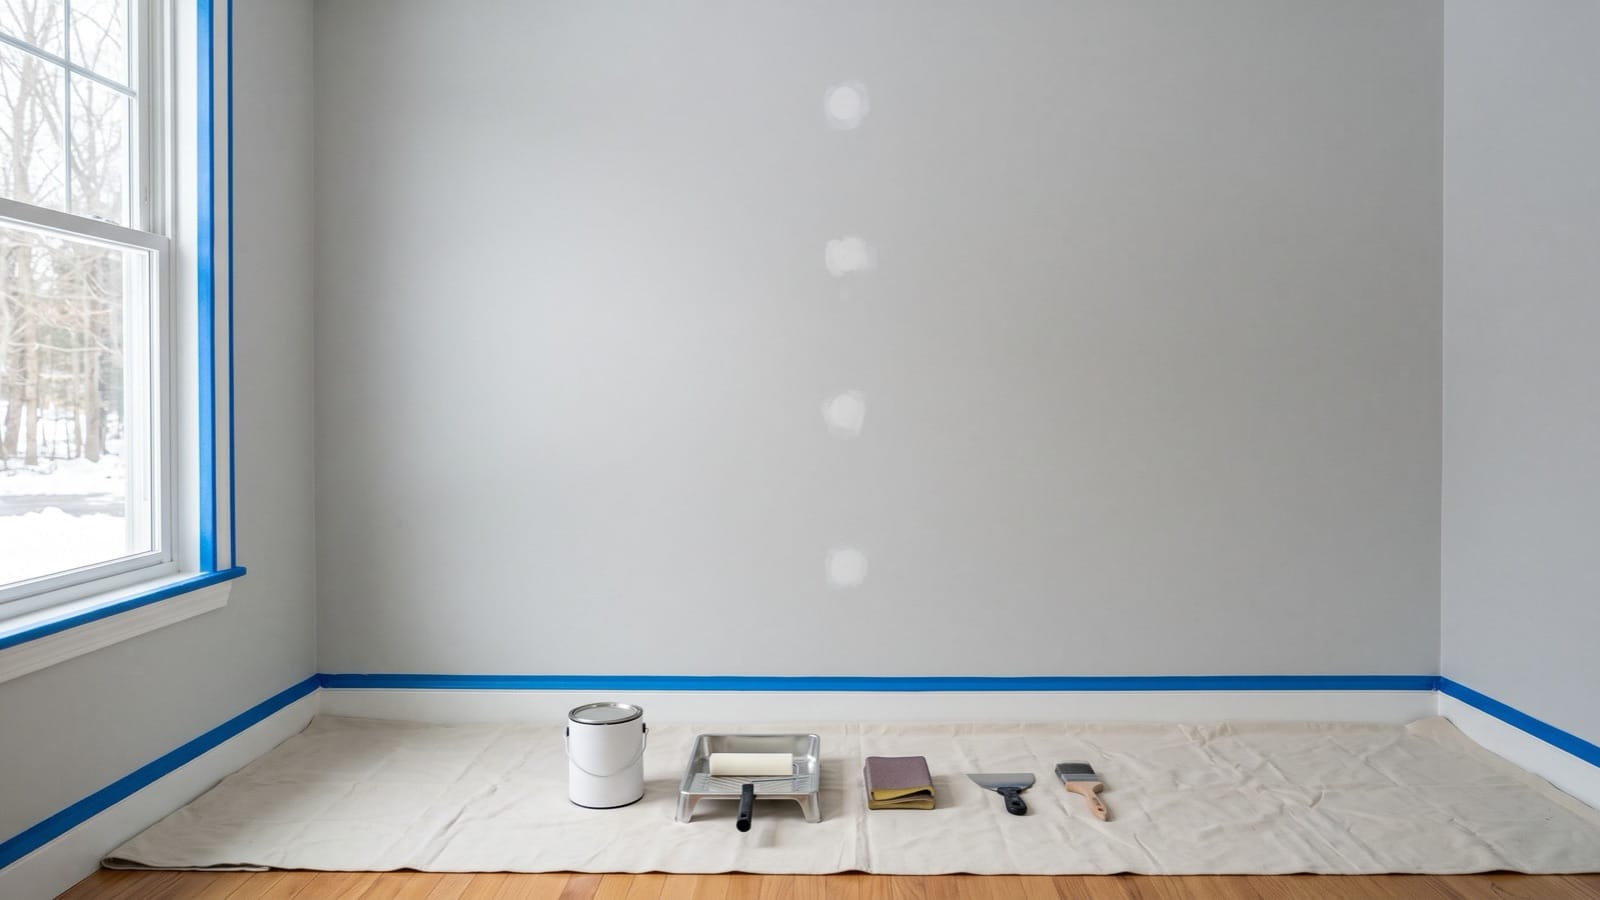
- Fill and feather. Two or three thin coats of joint compound, each dry before the next, feathered wide.
- Sand, then prime. We sand smooth and prime every patch so the compound doesn't show through the finish.
- Paint the whole wall. Two finish coats on the full wall or ceiling plane, corner to corner.
On a pre-1978 house, the old paint around a pop can contain lead. We use lead-safe methods on every pre-1978 home: containment, HEPA vacuums, wet scraping and proper disposal.
Why not just hammer the nail back in?
Because the stud has already shrunk away from the back of the board. Tapping popped nails down hides the heads for now, but nothing is holding the board tight, and the hole in the wood has been worked loose. The USG handbook calls the hammer-and-broad-knife reset "often effective" and calls a new nail or screw about 1-1/2 inches away "A more permanent method." For a wall we're about to paint, we use the permanent one.
Why we repaint the whole wall, not just the patch
Primed patches still read differently under finish paint, and a touch-up on paint that's been on the wall for years almost never matches in color and sheen. The USG handbook notes that even very small pops "may require repair if they occur in a smooth gloss surface or flat-painted surface under extreme lighting conditions." Raking light that shows a pop shows a patch just as well. Painting the full plane, from corner to corner and edge to edge, is what makes the repair disappear. If you're choosing a sheen for the repaint, see eggshell vs. satin for interior walls; flatter finishes hide repairs better.
Plaster walls need a different repair
Plaster on wood lath cracks and lets go for different reasons, and the fix is different too. If your walls are plaster, our guide to plaster wall repair before painting covers it.
Should you fix nail pops now or wait until spring?
It depends on when they showed up. GA-222 is direct about it: "Fastener pops that appear either before or during decoration should be repaired immediately. Those that appear one or more months into the heating season are usually a result of lumber shrinkage and should not be repaired until the end of the heating season." The USG handbook says the same: pops "that occur after one month's heating or more are usually caused wholly or partly by wood shrinkage and should not be repaired until near end of heating season."
If the framing is still drying, more pops can show up after the repair. Here's how we handle it:
- New house or addition in its first winter: we usually suggest waiting until spring for the drywall round and the paint, so it's done once.
- Older house you want painted now: we refasten the pops that are there with screws and paint. A few new ones may still appear.
- Ridged seams: wait until the ridge has fully formed, usually six months by the handbook.
Winter work also needs warmth. GA-216 says that where joint compound is being mixed or used, "the room temperature shall be maintained at not less than 50°F (10°C) for a period beginning not less than 48 hours before mixing or application and continuing until applied materials are thoroughly dry." In a cold porch or bonus room, read our guide to painting an unheated room in winter first.
How do you keep nail pops from coming back?
Good fastening does most of it, and steadier indoor humidity helps. The USG handbook's advice for builders:
- Screws over nails. "Type W screws are even better than the nails because they develop greater holding power and thus reduce possibilities for fastener pops."
- Shorter, ringed nails if nails are used. It cites a Purdue University study finding the shorter annular nail "lessens the chances for nail popping due to lumber shrinkage."
- Proper spacing. GA-216 says screws "shall be spaced not more than 12 in. (300 mm) o.c. for ceilings and 16 in. (400 mm) o.c. for walls where the framing members are 16 in. (400 mm) o.c." Fasteners at edges sit "not less than 3/8 in. (10 mm) from the edge or end."
For a homeowner, the lever is the indoor air. The Wood Handbook table shows wood moisture follows humidity, so steadier humidity means less movement and fewer nail pops in drywall. It won't stop a new house from drying out the first winter.
How much time do nail pop repairs add to a paint job?
Usually a day, sometimes less. The screws go in fast; the time is in the compound, since each coat has to dry before the next and before sanding and priming. A few popped nails on one wall fit into the normal prep day. Dozens of pops and taped seams across a house add more. For the whole schedule, see how long it takes to paint a room, and for a newer build's first repaint, repainting newer homes.
Nail pops in drywall around MetroWest
We see nail pops in drywall across Holliston, Hopkinton, Medway, Franklin, Framingham and Natick every winter. Newer houses, additions and finished basements show the most in their first heating season or two. Older colonials and capes with drywall hung over the years show a few each winter, often on stairwell walls and long hallway ceilings. In older homes with original plaster, we're more often dealing with cracks than pops. Either way, the visit starts with a work light held flat to the wall.
Frequently asked questions
Are nail pops in drywall a sign of structural problems?
Usually not. Most nail pops in drywall come from framing lumber shrinking as it dries, which the Gypsum Association calls the main cause. Get a builder or engineer to look if pops cluster in one area, keep coming back after a screw repair, or come with widening cracks, sticking doors or sloping floors.
Why do nail pops appear in winter?
Heated winter air is dry, and the wood framing dries and shrinks with it. The USDA Wood Handbook shows wood at 70 °F settling at 9.2% moisture in 50% humidity and 5.4% in 25% humidity. As studs shrink away from the board, fastener heads are left sticking out.
Can you just paint over nail pops in drywall?
You can, but they'll show through and usually keep rising. The board has to be refastened with a new screw about 1-1/2 inches from the pop, the old fastener set or pulled, then filled, sanded, primed and painted with the rest of the wall.
Should nail pops be fixed in winter or spring?
Pops that appear a month or more into the heating season are best fixed near its end. GA-222 says those pops "should not be repaired until the end of the heating season." If you're painting now, fixing them now is fine, but a few new ones may appear.
Is it normal to get nail pops in drywall in a new house?
Yes. The USG handbook says framing lumber goes in at 15% to 19% moisture, dries to about 10% and shrinks, "particularly during the first heating season." That's why new houses and additions often show their most pops in the first winter.
Why do nail pops keep coming back?
Usually because the nail was hammered back without pulling the board tight, the framing is still drying, or the screw missed the stud. A new screw in the same stud about 1-1/2 inches away, with the board pressed tight, holds better than resetting the old nail.
Do nail pops in drywall ceilings mean truss uplift?
Not always. Pops in the middle of a ceiling are usually framing shrinkage. Pops and a crack right along the ceiling-wall corner that open in winter and close by summer often point to truss uplift, which a painter can't stop, only finish around.
The bottom line
Winter nail pops in drywall and seam cracks are the framing drying out, and in most houses they're cosmetic. Fix them the way the standards say: press the board tight, add a screw about 1-1/2 inches from the pop, set or pull the old fastener, fill, sand and prime, then paint the whole wall. If they appeared well into the heating season, waiting for spring usually means doing the job once.
Talk to Paint Pro
Paint Pro New England is based in Holliston and has painted homes across MetroWest for more than fifteen years. We are fully licensed and insured, including workers' compensation, use premium Benjamin Moore and Sherwin-Williams paints, back our work with a 2-year warranty on all work, and have more than 60 five-star reviews on Houzz. See our interior painting services for walls, ceilings, trim and doors. Call or text Dave at (774) 217-9567. You can also request a free, no-obligation estimate online.
Dave Griffiths
Dave Griffiths is the owner of Paint Pro New England, a professional painting company serving MetroWest Boston since 2011. With 15+ years of interior and exterior painting experience across the region, he leads every project with thorough prep, premium Benjamin Moore and Sherwin-Williams paints, and a 2-year warranty.

